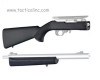
PIKE ARMS® ELITE22™ RIFLE ASSEMBLY HARDWARE PACKAGE FOR 10/22® STYLE RIFLES - BLUE OR STAINLESS
In order to complete a Pike Arms® ELITE22™ series receiver into a complete rifle, you will need this rifle hardware in additon to the receiver to complete the rifle assembly. The Tactical Innovations® ELITE22™ Receivers are sold without the associated assembly hardware so if you already have the required additional parts, you are not forced to purchase them. The receiver hardware package parts are available individually per each corresponding part number below or you can purchase all of the required rifle assembly hardware in this money saving bundle.
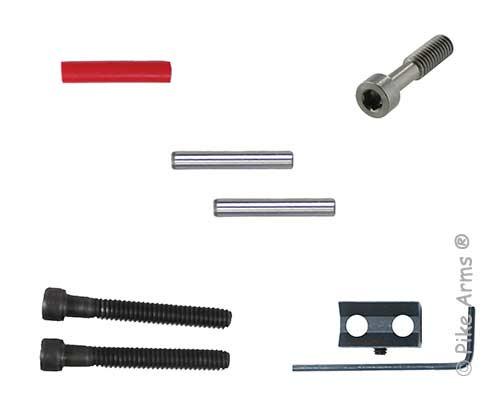
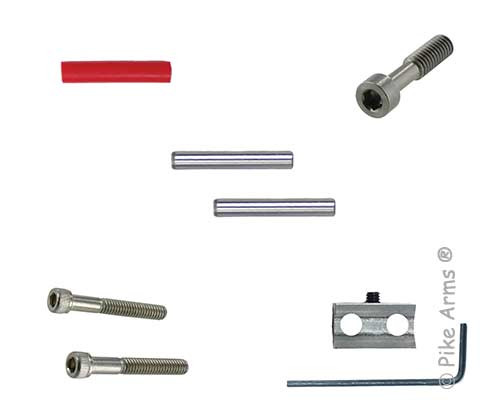
The follow parts are included in this Pike Arms® Elite22™ Hardware Package:
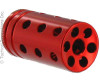
#00203 - Pike Arms® Red Bolt Buffer
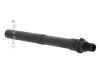
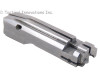
#00916 - Pike Arms® Receiver Cross Pins, Precision Ground & Hardened (2 Quantity)
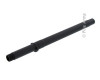
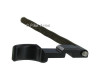
#00464 - Pike Arms® Receiver / Stock Takedown Cap Screw, Stainless Steel
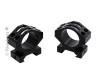
CHOICE OF BLUE OR STAINLESS V-BLOCK & CAP SCREWS:
#00204 - Pike Arms® Adjustable V-Block - Blue
#00910 - Pike Arms® V-Block Cap Screw - Blue
or
#00205 - Pike Arms® Adjustable V-Block - Stainless Steel
#00911 - Pike Arms® V-Block Cap Screw - Stainless Steel
Although the parts in this ELITE22™ Rifle Assembly Hardware Package are intended for the assembly of a complete rifle using a Tactical Innovations® Elite22™ receiver, these parts are also compatible with Ruger® factory receivers and rifles. This hardware package is compatible with the following ELITE22™ receivers: Elite22™, Elite22LC™, Elite22S™, Elite22TD™, Elite22D™ and CH22™ as well as the corresponding Elite22™ 80% recevier blanks.
In order to make sure you are not missing a part that you'll need to put your custom rifle together, this Rifle Assembly Hardware bundle has everything you need and is also great for spare parts to have on hand for repairs.
INSTALLATION INSTRUCTIONS
Installation is fast and easy and will allow you to compensate for any barrel droop to ensure that your barrel is on the same line as your receiver rail. If your barrel droops when the V-Block is tightened, its possible for the barrel to be so low that the scope does not have sufficient range to compensate.
1. Place the barrel in the receiver hole.
2. Place the Adjustable V-Block in the barrel cut-out with the setscrew orientated so that the setscrew can be adjusted while the V-Block is on the gun.
3. Install both cap screws through the V-Block into the receiver and tighten until they just have MINIMAL torque resistance. DO NOT TIGHTEN THEM.
4. Stand the receiver up on the rear of the receiver with the barrel pointing toward the ceiling. Ensure that the extractor cut is correctly orientated to the extractor on the bolt.
5. With the receiver and barrel pointing toward the ceiling, push the barrel tightly against the receiver. This is the position that you want the V-Block to hold the barrel when the cap screws are tightened. While holding the barrel against the receiver, turn the setscrew in the Adjustable V-Block until it is pushing on the barrel and begins to minimally push the barrel upwards. Back the screw off until there is no upwards push on the barrel but the setscrew is still in contact with the barrel.
6. Tighten each capscrew to snug the barrel to the receiver. Do not over torque the screws. Overtorquing the cap screws can strip the aluminum threads in the receiver and will render the receiver not usable.
Verify that the extractor on the bolt is lined up with the barrel and installation is complete.
 WARNING: This product can expose you to chemicals including lead, which are known to the State of California to cause cancer and birth defects or other reproductive harm. For more information go to www.P65Warnings.ca.gov.